How to Restore Old Retro Gaming Consoles: A Step-by-Step Guide with Essential Tools for Nostalgic Gamers
Restoring old retro gaming consoles helps you relive the fun of the 80s and 90s. Many gamers want to connect with their childhood memories and enjoy those classic games again. This guide shows you how to restore old retro gaming consoles step by step. You will learn the tools you need and the process to bring your favorite consoles back to life, giving you a chance to enjoy the gaming experiences you loved.
Understanding Your Retro Gaming Console
Key Takeaway: Knowing your console’s type and its common problems can save you time and effort in the restoration process.
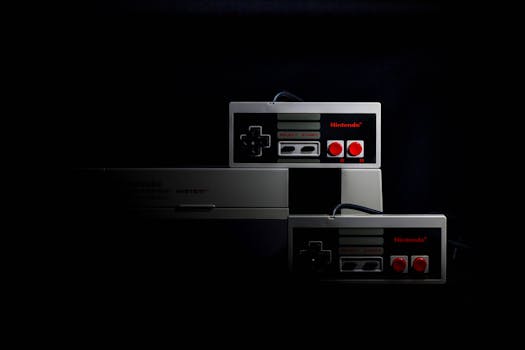
When you think about retro gaming consoles, you might picture the classic systems from the 80s and 90s like the Nintendo Entertainment System (NES), Sega Genesis, or TurboGrafx-16. Each of these consoles comes with its unique quirks and issues due to age. For example, an NES might suffer from a blinking red light due to dust in the cartridge slot, while a Sega Genesis might have yellowed plastic from exposure to light over the years.
These vintage systems often face problems like hardware degradation, dusty circuits, and worn-out connection ports. Dust can settle into the circuit boards, causing poor connections. Worn-out ports can make it hard to connect controllers or power supplies. Understanding these challenges is the first step in restoring old video game consoles.
For instance, many gamers who grew up with the Game Boy might find that their devices no longer hold a charge or have screen issues. These are common signs that your console needs some love and attention.

Gathering Essential Tools and Materials
Key Takeaway: Having the right tools at hand will make your restoration easier and more effective.
To start restoring your vintage console, you’ll need a few essential tools. Here’s a checklist to help you gather everything you need:
- Screwdrivers: A set of Phillips and flathead screwdrivers will help you open the console.
- Cleaning Kits: Use isopropyl alcohol and cotton swabs to clean the interior and exterior.
- Replacement Parts: Check online retailers for common parts like capacitors, power supplies, and controllers.
- Multimeter: This tool helps you check for electrical issues in the circuitry.
- Heat Gun or Soldering Iron: Useful for fixing loose connections.
You can find these tools at local hardware stores or online marketplaces. Investing in quality tools can make a significant difference in achieving a professional restoration. Always remember, a poorly executed fix might lead to more issues down the road (and nobody wants that headache!).
The Step-by-Step Restoration Process
Key Takeaway: Follow this detailed guide to restore your retro console and bring back your childhood memories.
1. Initial Assessment and Cleaning
Start by assessing your console’s condition. Check for physical damage and make a note of any issues. Next, use a cleaning kit to remove dust and grime from the exterior. Pay special attention to the cartridge slot and ports, as these areas often collect dirt.
2. Disassembly and Inspection
Once your console is clean, it’s time to disassemble it. Use your screwdrivers to carefully open the case. Keep track of each screw and part, as you’ll need them for reassembly. Inspect the internal components for signs of wear or damage. Look for leaking capacitors or corroded connections.
3. Troubleshooting and Repairs
This step may involve some detective work. Here are common faults and fixes:
Cartridge Connection Issues: If your game doesn’t start, clean the cartridge contacts with isopropyl alcohol.
Power Issues: If the console won’t turn on, check the power supply and test it with a multimeter. For those looking to tackle these projects themselves, consider budget DIY techniques for restoration.
Console Modifications: If you’re interested in modding, check out our article on how to publish a game console.
Screen Problems (for handhelds): For devices like the Game Boy, replace the screen if it has dead pixels or is too dim.
4. Reassembly, Testing, and Final Touches
Once repairs are made, reassemble your console carefully. Test it with a game to ensure everything works. If it does, give it a final cleaning and polish the exterior to make it shine like new.

Troubleshooting and Tips for Long-Term Preservation
Key Takeaway: Preventive care can help your console stay in great shape for years.
Even after restoring your console, you might encounter issues down the line. Here are some troubleshooting tips:
- Check Connections Regularly: Make sure all cables and controllers are connected properly.
- Use Protective Cases: Store your consoles in protective cases to avoid dust and damage.
- Maintain a Clean Environment: Keep your gaming space clean and avoid exposing your consoles to direct sunlight or moisture.
For long-term preservation, consider periodically checking the internal components. Just like how you might change the oil in your car, your console needs some maintenance too.
Additional Resources and Community Connections
Key Takeaway: Join the retro gaming community to learn more and share your experiences.
Restoring old retro gaming consoles is not just about fixing hardware; it’s also about reconnecting with a community that shares your passion. There are many forums and online groups where you can find tips, share your projects, and learn from others. Websites like Reddit and dedicated gaming forums have sections for retro gaming enthusiasts.
In these communities, you can find people who have restored the same consoles. They can offer insights you might not find in a manual. Sharing your restoration journey can also inspire others to dive into their own projects.

By understanding your console, gathering the right tools, and following these detailed steps, you can successfully restore your favorite retro gaming systems. Reconnect with your past and enjoy the gaming experiences that shaped your childhood. Happy gaming!
FAQs
Q: I’m having trouble finding the right techniques for cleaning and repairing sensitive internal components without compromising authenticity—what are some detailed methods I can follow?
A: For cleaning and repairing sensitive internal components, use isopropyl alcohol with a cotton swab to clean connectors and surfaces, avoiding excessive moisture. For repairs, follow detailed guides specific to the device, using proper tools like soldering irons for component replacement, and ensure you have the correct specifications to maintain authenticity.
Q: I’m curious about which essential tools are truly necessary for a step-by-step restoration project—can you explain what makes each tool indispensable for handling vintage consoles?
A: For a step-by-step restoration project of vintage consoles, essential tools include a soldering iron for replacing faulty components, a multimeter to measure voltage and diagnose electrical issues, and various screwdrivers (including specialized ones) for safely opening the console. Additionally, having heat shrink tubing and miscellaneous wires is crucial for ensuring secure connections and repairs.
Q: I often run into issues like power failures or erratic performance during my restoration projects—what troubleshooting steps should I take for diagnosing and fixing these specific problems?
A: To troubleshoot power failures or erratic performance in restoration projects, first check the power supply for proper voltage output and connections; replace it if necessary. Next, inspect and clean connectors using isopropyl alcohol to ensure good contact, and ensure all internal components are free of dust and debris. If issues persist, test individual components for faults or degradation.
For more information on fixing common issues, check our troubleshooting guide for retro consoles.