How to Repair Nintendo NES Cartridges: DIY Tips for Repairing Game Cartridges at Home for 80s and 90s Adult Gamers
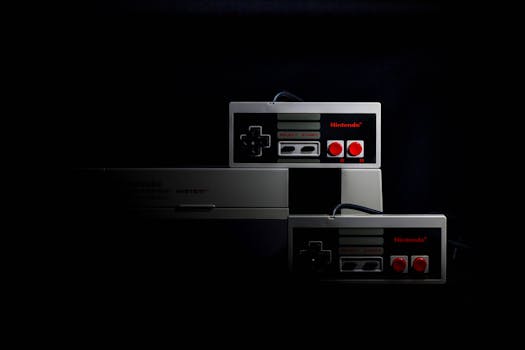
Rediscovering classic video games from the 80s and 90s can bring back fond memories for adult gamers. In this guide, you will learn how to repair Nintendo NES cartridges, a fun way to revive your favorite games while saving money. DIY repairs not only help preserve your childhood favorites but also connect you with others who share your passion for retro gaming. Let’s explore the simple steps for repairing game cartridges and keeping your gaming memories alive.
Understanding Nintendo NES Cartridges
The Anatomy of Your Favorite Retro Game Cartridges
Nintendo NES cartridges are not just pieces of plastic; they hold a special place in the hearts of many adult gamers who fondly remember the excitement of playing their favorite titles in the 80s and 90s. These cartridges store the games that defined a generation and are crucial for reliving those nostalgic moments. Understanding how these cartridges work will help you appreciate the need for repairs and maintenance (because who wants to miss out on playing Super Mario Bros. again?).
Common issues that might make you think about repairing game cartridges include worn contacts or broken shells. Worn contacts often lead to glitches or the game not loading at all. Meanwhile, broken shells can cause the cartridge to fall apart, making it nearly impossible to use. Knowing these problems will help you identify when it’s time for a DIY repair.

Essential Tools and Safety Tips for Repairing Cartridges
Must-Have Tools and Equipment for DIY NES Cartridge Repair
Before you jump into repairing your old cartridges, you need to gather a few essential tools. This will not only make the process easier but also safer. Here’s a list of what you’ll need:
- Precision Screwdrivers: These are crucial for opening up the cartridges. A standard Phillips screwdriver won’t cut it, as most NES cartridges require a specific 3.8mm or 4.5mm security bit to open.
- Cleaning Kits: These often include isopropyl alcohol and cotton swabs. You’ll use these to clean the contacts, which can get dirty over time.
- Replacement Parts: Depending on the damage, you might need replacement contacts or even new cartridge shells.
Safety is also important. Make sure to work in a well-lit area and keep your tools organized. This helps prevent accidents (like stepping on a rogue screwdriver—ouch!).
Also, remember that handling old electronics requires care. Always make sure the cartridge is unplugged and free of any dust before you start. This is similar to how you’d carefully handle any vintage item—think of it as taking care of a precious family heirloom.
Step-by-Step Guide: How to Repair Nintendo NES Cartridges at Home
DIY Steps for Repairing Broken Game Cartridges at Home
Now that you have your tools ready, let’s dive into the hands-on part of how to repair Nintendo NES cartridges. Follow these steps to fix common problems.
How to Open Game Cartridges: Start by using your precision screwdriver to remove the screws holding the cartridge together. Take your time with this. Some screws may be tight, and you don’t want to strip them.
Cleaning Contacts: Once you open the cartridge, you will see the metal contacts. Use your cleaning kit to gently clean these contacts with isopropyl alcohol and a cotton swab. This can often fix loading issues.
Replacing Worn Components: If the contacts are too worn or damaged, you may need to replace them. Carefully remove the old contacts and solder in new ones if you have the skills. If not, consider reaching out to someone who does.
Reassembling the Cartridge: After cleaning or replacing parts, carefully put the cartridge back together. Make sure everything aligns properly. Tighten the screws, but don’t overdo it—just enough to hold it securely.
Testing: Finally, insert your repaired cartridge into your NES and turn it on. Fingers crossed, it should work like a charm!
By following these steps, you’ll be well on your way to restoring classic gaming hardware at home.

Advanced Repairs and Customizations
Beyond the Basics: How to Replace Game Cartridge Shells and More
If you want to take your repairs to the next level, consider learning how to replace game cartridge shells. This not only helps with aesthetics but also improves the cartridge’s durability. Here’s how you can do it:
Finding Replacement Shells: Look online for compatible cartridge shells. Many retailers sell them specifically for NES games. Make sure you get the right one for your game.
Transferring the Internals: Open your old cartridge as described earlier, and carefully transfer the internal components into the new shell. This step requires patience and precision, so take your time.
Reassembly and Testing: After moving the components, snap the new shell together and test it. A fresh shell can make your old game feel like new again!
Additionally, you can upgrade or mod classic cartridges with modern components. Some enthusiasts even install flash memory that allows you to play multiple games from one cartridge. This can be a fun way to modernize your gaming experience, blending nostalgia with new technology.
Troubleshooting and Expert Tips
Common Issues and How to Solve Them
Even with the best repairs, you might encounter some issues. Here are common repair pitfalls and tips to troubleshoot them:
- Game Still Won’t Load: If your game isn’t loading after cleaning the contacts, check the alignment of the contacts. They should sit snugly against the game board. Sometimes, they can shift during reassembly.
- Cartridge Won’t Fit: If the cartridge seems too tight in the console, make sure there are no misaligned components inside. Take it apart and check everything is seated correctly.
- Noise or Flickering Graphics: If you experience audio issues or graphical glitches, it might be a sign of damaged internal components. In this case, you may need to replace more than just the contacts.
Many retro gaming enthusiasts have faced similar challenges. Online communities can be a great resource. Forums and social media groups often have members willing to share their experiences and offer advice.

By following these troubleshooting tips, you can keep your cartridges in top shape and enjoy gaming without frustration.
Bringing your beloved NES games back to life is not only rewarding but can also be a fun bonding experience with friends and family. Happy gaming!
FAQs
Q: What specific tools and cleaning methods should I use to open my NES cartridge without risking damage to its internals?
A: To open your NES cartridge safely, use a 3.8mm security bit screwdriver, as NES cartridges typically have tamper-proof screws. Before opening, ensure you work in a static-free environment, and use a soft cloth or anti-static mat to prevent damage to the internal components.
Q: When replacing a broken or worn-out cartridge shell, how can I ensure that the reassembly maintains both functionality and the cartridge’s vintage look?
A: To ensure that reassembly maintains both functionality and the vintage look of a cartridge shell, carefully source high-quality replacement shells that closely match the original design and materials. Additionally, pay attention to the internal components and ensure they are compatible with the new shell while retaining the aesthetic details, such as colors and markings, of the vintage cartridge.
Q: If I repair the cartridge but it still doesn’t work in my console, what troubleshooting steps can I take to pinpoint whether the issue is with the circuitry, solder joints, or another component?
A: To troubleshoot a non-working cartridge after repair, first visually inspect the solder joints for any signs of cold solder or bridging. Then, use a multimeter to check for continuity in the circuit traces and ensure that the cartridge pins are making proper contact with the console’s connectors. Additionally, testing the cartridge in another working console can help determine if the issue lies with the cartridge itself or the original console.
Q: How can I safely conduct repairs at home on a Nintendo cartridge while protecting its value as a collectible item?
A: To safely conduct repairs on a Nintendo cartridge while protecting its collectible value, use non-invasive methods such as cleaning the contacts with isopropyl alcohol and a soft cloth, and avoid modifying the internal components. If repairs require soldering or more extensive work, consider consulting a professional restoration service that specializes in vintage electronics to maintain the integrity and value of the cartridge.
For those interested in delving deeper into the world of retro gaming, check out this comprehensive guide to restoring retro gaming consoles for more tips and techniques.