Emulator Setup for Retro Games: A Step-by-Step Guide to Setting Up Retro Gaming on PC for Nostalgic Adult Gamers
Reliving the classic video games from the 80s and 90s is a thrilling experience for many adult gamers. With an emulator setup for retro games, you can easily reconnect with your childhood favorites right from your PC. This guide shows you how to set up your own retro gaming station at home so you can enjoy the nostalgia. Learn how to bring those timeless classics back to life and be part of the vibrant retro gaming community.
Understanding the Retro Gaming Landscape
Exploring Nostalgia and the Rise of Retro Gaming
Retro gaming is more than just a hobby; it’s a way for adult gamers to connect with their childhood. Many people remember spending hours in front of a TV, controlling their favorite characters through pixelated worlds. The rise of retro gaming comes from this nostalgia. It brings back the happy memories of simpler times when games focused on fun and creativity.
Setting up an emulator for retro games helps you relive those moments. It is cost-efficient because you can play many games without buying old consoles or cartridges. With a good emulator setup, you can access lost classics that are hard to find today. You can play your childhood favorites right from your PC, making it a great way to configure emulator settings for retro gamers at home.

Essential Hardware and Software Components
Assembling Your Retro Gaming Toolkit
To start your retro gaming emulator setup, you need the right tools. Here’s what you need:
1. PC Specifications
Your computer should be strong enough to run emulators smoothly. Ideally, aim for at least:
- Processor: Dual-core or better
- Memory (RAM): 4GB or more
- Graphics: Integrated graphics are fine for most retro games
2. Displays
A good monitor makes gameplay enjoyable. You can use your regular PC monitor or connect to a large TV for a more immersive experience.
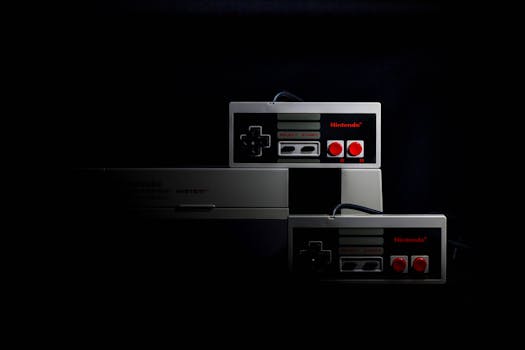
3. Controllers
Using a controller makes gaming more fun. You can use USB controllers that look like classic game controllers or adapt your existing ones. Some popular options include:
- USB Gamepad: Affordable and easy to use
- Bluetooth Controllers: Wireless options for a modern feel
4. Peripherals
Consider using a keyboard and mouse for some games. You might also need speakers or headphones for the best sound experience.
5. Emulator Software Options
To set up your emulator for retro gaming on PC, choose from popular emulators like:
RetroPie: Great for a wide variety of games
RecalBox: Simpler to use, perfect for beginners
MAME: Best for arcade games
Each emulator has unique features. RetroPie offers extensive customization, while RecalBox is user-friendly for those just starting.
Tip: Check out user reviews online to find the best emulator for your needs.
Step-by-Step Guide on How to Set Up Retro Game Emulators for Beginners
From Download to Play—A Beginner’s Walkthrough
Now that you have your hardware and software ready, let’s discuss how to install and configure your emulator. Follow these steps for a successful emulator setup for retro games:
Step 1: Download the Emulator
Visit the official website of your chosen emulator. Click on the download link and save the file to your computer.
Step 2: Install the Emulator
Open the downloaded file and follow the setup instructions. This usually involves clicking “Next” a few times. (It’s easier than assembling IKEA furniture, trust me!)
Step 3: Configure Settings
Once installed, open the emulator. You might need to adjust graphics and audio settings. Look for options that fit your PC specifications.
Look for options that fit your PC specifications.
Step 4: Load Games (ROMs)
Next, you need to add games to your emulator. This involves downloading ROMs, which are files that contain the game data. Make sure to get these from legal sources. Many classic games are available for free or for purchase.
Step 5: Start Playing
After loading your games, select one from the menu and start playing! Use the controller or keyboard to enjoy your game.
Common Pitfalls:
- Not having the right BIOS files can prevent some emulators from working. Check the emulator’s website for guidance on BIOS files if needed.
- Make sure your PC meets the minimum requirements for the emulator to avoid lagging during gameplay.

Enhancing Your Retro Gaming Experience: Tips and Best Practices
Customizing and Optimizing Your Emulator Setup for Peak Performance
To make your emulator setup for retro games even better, consider these tips:
1. Performance Tweaks
Adjust settings for better performance. Lowering the graphics settings can help if you experience lag. Sometimes, turning off unnecessary features, like shaders, can improve speed. Additionally, you may want to refer to some troubleshooting retro emulator issues to resolve potential problems that could arise during gameplay.
2. Controller Configuration
Configure your controller for the best gameplay experience. Most emulators allow you to customize button layouts. Make sure it feels comfortable and works well for you.
3. Aesthetic Customization
Change the look of your emulator by using different themes or skins. Many emulators allow you to personalize your interface. This makes your gaming experience feel unique.
4. Community Resources
Join retro gaming communities online. These forums are great for sharing tips and tricks. You can learn from others who have set up their systems. Sites like Reddit and Discord have many active retro gaming groups.
Example:
Some members share their custom controller setups. You can find valuable advice and even download themes made by other gamers.
Remember: Personalizing your setup can make a big difference. It’s like decorating your gaming space—every little detail counts!

Rediscover Your Past – Play Your Favorite Classics with Confidence
Setting up an emulator for retro games is a straightforward process. With the right hardware, software, and a little guidance, you can enjoy your favorite classics from the 80s and 90s. The steps outlined here help you navigate everything from installation to customization.
Now that you understand how to build a retro gaming setup at home, you can confidently dive back into the worlds you loved as a child. Whether you want to relive the excitement of arcade hits or console favorites, the joy of retro gaming is just a few clicks away.
FAQs
Q: I’m experiencing occasional performance lags and graphical glitches with my retro game emulators—what advanced configuration options or troubleshooting steps can help smooth out my gameplay on a modern PC?
A: To improve performance and reduce graphical glitches in your retro game emulators, try lowering your display resolution to 720x576 or 640x480, as this can enhance emulator performance. Additionally, ensure that OpenGL support is enabled in your emulator settings and adjust graphics options such as texture quality and filtering to lower values for smoother gameplay.
Q: I’m building a dedicated retro gaming setup at home and want optimal compatibility across games—how should I configure hardware and emulator settings to handle different systems and titles seamlessly?
A: To achieve optimal compatibility for your retro gaming setup, ensure you connect a suitable display (preferably a 4:3 CRT for older games) and configure your Raspberry Pi’s resolution to 720x576 or 640x480 for better emulator performance. Additionally, install and configure multiple emulators, like lr-mame for arcade games, and utilize Steam Link for streaming more modern titles while adjusting control settings to match your preferred controller layout.
Q: I’ve noticed some emulators require tweaking for certain games to run correctly—what are the key adjustments or hidden features I can explore to fine-tune compatibility and enhance the overall gaming experience?
A: To enhance compatibility and overall gaming experience with emulators, you can adjust settings such as graphics plugins (e.g., using OpenGL Driver), configure sound options, and select specific emulators for different games. Additionally, ensure that the emulator’s resolution and frame rate settings are optimized, and consider using BIOS files where required for better performance.
Q: I’m curious about integrating custom controls and display settings for a more authentic retro experience on my PC—what advanced tips can you offer for personalizing emulator setups beyond basic installation?
A: To enhance your retro gaming experience, customize controls in your emulator settings to match the original console layouts, and consider adjusting display settings such as resolution and aspect ratio for a more authentic look. Additionally, utilize overlays that mimic the bezels of vintage screens, and experiment with shaders to replicate classic graphical effects for a nostalgic feel. For those interested, exploring best free software for emulating retro games on Linux can provide additional insights and tools to enhance your setup.