DIY Retro Game Controller Projects: Build Retro Controllers Compatible with Modern Systems for Enthusiastic 80s/90s Gamers
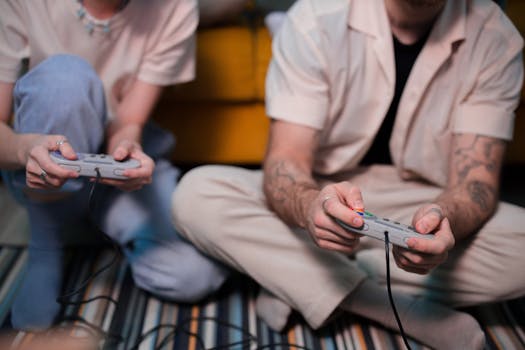
Many adults who grew up in the 80s and 90s remember the excitement of classic video games. DIY retro game controller projects let you relive those memories while enjoying modern gaming systems. You can create unique controllers that combine vintage designs with today’s technology. This guide shows how to build your own retro controllers and connect with others who share your love for classic gaming.
The Evolution of Video Game Controllers
The journey of video game controllers is quite fascinating. From simple joysticks to complex modern designs, each step shows how gaming has changed. The Nintendo NES controllers stand out as a classic example of retro controller design. These controllers introduced the iconic “D-pad” and laid the groundwork for future designs. They made gaming more accessible and enjoyable.
Why do we care about these designs today? Because they inspire DIY retro game controller projects! By understanding the evolution of controllers, you can appreciate how to blend nostalgia with modern technology. Think of it like baking a cake: you need both the old family recipe and some new ingredients to make it delicious.

Planning Your DIY Retro Game Controller Project
Before diving into your DIY project, it’s important to plan. Start by gathering the right materials. You will need a few key items, including:
- Controller Shell: This is the outer part of your controller, which can be a classic design or something unique.
- Buttons and Joysticks: Choose buttons that feel good to press and joysticks that provide accurate control.
- Circuit Board: This is the brain of your controller. You can buy a pre-made one or create your own using a Raspberry Pi.
You also need some tools, like a soldering iron and wire cutters. (If you’ve never soldered before, don’t worry! It’s like using a hot glue gun but with metal!)
Next, brainstorm your design. Consider how you want your controller to look and feel. Do you want it to resemble the controllers of your childhood, or do you want to add a modern twist? Either way, aim for retro game controllers that are compatible with modern systems.
Choosing components wisely is important. You want your controller to look like a classic but work well with today’s consoles. Check online for parts that are specifically made for retro games. You can often find these at electronics stores or online marketplaces.
Crafting the Perfect Controller for Your Gaming Setup
Now that you have your materials and a plan, it’s time to build! Here’s how to craft the perfect controller.
- Assemble the Shell: Start by putting together the outer shell of your controller. Make sure it feels comfortable in your hands.
- Install Buttons and Joystick: Attach the buttons and joystick to the shell. You want them to be easy to reach, just like in the classic controllers.
- Connect the Circuit Board: Carefully connect the circuit board to the buttons and joystick. Make sure everything is secure, so it works well during gameplay.
- Test Your Controller: Before sealing it up, test your controller to ensure it works. This is the time to fix any issues.
When building your controller, remember ergonomics. You want your controller to be comfortable for long gaming sessions. Think about how you hold it and where your fingers rest. This way, you can avoid sore hands and enjoy your gaming marathons!
This process can be a lot of fun. Many enthusiasts share their successful builds online. You can find inspiration and tips from others who have gone through the same journey. It’s like joining a club where everyone loves the same hobby!

You can explore more about retro gaming controller designs and get inspired by others who share your passion for gaming!
Enhancing Functionality: Adapting to Various Consoles
One of the best parts about your DIY retro game controller project is making it work with different consoles. You can enjoy games from both classic and modern systems!
To ensure compatibility, consider these methods:
- Firmware Updates: Some controllers need software updates to work with newer consoles. Check the manufacturer’s website for the latest downloads.
- Adapters: These handy devices allow you to connect your controller to modern consoles. They can bridge the gap between old and new technology.
- Community Hacks: The retro gaming community is full of creative solutions. Look online for tips and tricks shared by fellow gamers. You might find that someone has already figured out how to connect your controller to a specific console!
While DIY projects can be rewarding, you might wonder how they compare to buying ready-made controllers. Many pre-made options exist, including some of the best retro game controller innovations for old consoles. These can save you time and effort, but they might not offer the personal touch you get from building your own.
Consider your skills and how much you enjoy crafting. If you love building things and want a unique controller, go for the DIY route! But if you prefer convenience, buying might be the way to go.

Conclusion
In summary, merging nostalgic designs with modern functionality is key to successful DIY retro game controller projects. With a little creativity and technical know-how, you can create a unique controller that enhances your gaming experience.
So, gather your materials, plan your design, and start crafting! Whether you want to relive your childhood or just enjoy some fun gaming, building your own controller is a great way to do it. Don’t forget to share your builds and ideas with others in the retro gaming community!
FAQs
Q: How can I modify a classic controller to work with modern systems without losing its retro charm?
A: To modify a classic controller for use with modern systems while retaining its retro charm, you can replace the internal components with a USB-compatible PCB or adapter that fits inside the original casing. Additionally, consider using 3D-printed custom mounting brackets for USB connections to maintain the aesthetic of the classic controller.
Q: What should I consider for ergonomics to ensure my DIY controller stays comfortable during long gaming sessions?
A: To ensure your DIY controller remains comfortable during long gaming sessions, focus on an ergonomic design that accommodates various hand sizes and shapes, using anthropometric data to guide the layout. Incorporate features like a natural grip, button placement that aligns with your fingers, and a lightweight structure to minimize strain and discomfort over extended use.
Q: How do I source and integrate quality parts from popular retro brands while keeping my project budget-friendly?
A: To source and integrate quality parts from popular retro brands while maintaining a budget, explore local thrift stores, garage sales, and indie retro game shops for used or broken consoles that can be repurposed, often at low prices. Additionally, consider online marketplaces like eBay or specialized retailers that offer discount codes for components, and focus on commonly available parts that are widely used in the DIY community to ensure compatibility and affordability.
Q: What challenges might I face when restoring or replicating elements from rare retro controllers for my DIY build?
A: When restoring or replicating elements from rare retro controllers for a DIY build, you may face challenges such as sourcing original or compatible parts, which can be difficult due to their rarity and potential high costs. Additionally, achieving the same level of functionality and aesthetics as the original controller may require advanced technical skills in electronics and design, along with access to specialized tools like 3D printers or soldering equipment.