How to Connect Retro Game Controllers: Adult Gamers' Guide on How to Repair Retro Game Controllers and Tackle Controller Issues
Many adult gamers feel a strong pull to the classic video games of the 80s and 90s. They want to relive their childhood memories and reconnect with old friends through gaming. This guide shows you how to connect retro game controllers and tackle common repair issues. You will learn about fixing controller problems, making it easier to enjoy your favorite classics again.
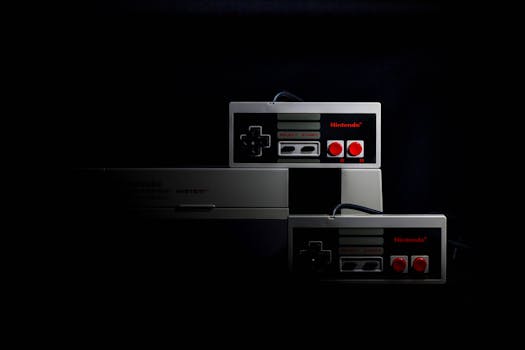
Reviving the Classics – Understanding Retro Game Controllers
Classic game controllers bring back memories for many adult gamers. They remind us of simpler times when gaming was just about fun and friends. In recent years, retro gaming has become very popular again. A survey showed that about 60% of gamers enjoy playing older games, often using the original controllers. This interest in nostalgic gaming fuels our desire to connect and restore these classic pieces of tech.
However, old controllers can have issues. You might find that buttons stick, wires fray, or connections fail. These problems can be frustrating but are common among vintage hardware. Knowing how to fix these controller issues can help you enjoy your gaming experience without a hitch.
Learning how to repair retro game controllers not only saves money but also connects you with the gaming community. Plus, it’s satisfying to bring an old controller back to life. In this section, we’ll explore the charm of retro gaming and common problems you might face.
Common Issues with Old Controllers
As controllers age, they often develop several issues. Here are some of the most frequent problems:
- Sticky Buttons: Dirt and grime can build up under the buttons, making them hard to press.
- Connection Problems: Wires can wear out or become loose, leading to intermittent connections.
- Physical Damage: Controllers can suffer from drops or spills, which may break components.
These issues are not just annoying; they can ruin your gaming experience. But don’t worry! We’ll discuss how to tackle these problems later in the article.
Overview of Repair and Refurbishing
Learning how to repair retro game controllers can be a rewarding experience. Not only do you save money, but you also gain valuable skills. You’ll learn about the best methods for refurbishing classic game controllers. These methods include cleaning, replacing parts, and testing for functionality.
Understanding your controller’s inner workings will help you diagnose problems easily. This knowledge will prepare you for the next steps in your journey to restore your beloved gaming equipment.

Essential Tools, Equipment, and Preparation
Before diving into repairs, you’ll need the right tools and a good workspace.
Tools You Need for the Job
Here’s a list of essential tools for repairing retro game controllers:
- Screwdrivers: A set of small screwdrivers, including Phillips and flathead.
- Cleaning Solutions: Isopropyl alcohol and cotton swabs for cleaning components.
- Replacement Parts: Buttons, wires, and connectors can often be found online.
- Multimeter: Useful for checking connections and voltage.
When sourcing parts, look for reputable online retailers. Websites like eBay and specialized gaming shops often have quality replacement parts, along with helpful maintenance tips for controllers.
Setting Up Your Workspace
To create a safe and functional repair area, follow these steps:
- Choose a Clean Surface: Use a table or desk where you can spread out your tools and controllers.
- Good Lighting: Ensure your workspace is well-lit so you can see small components clearly.
- Organize Your Tools: Keep your tools within reach to avoid frustration during repairs.
Safety is also important. Make sure you are grounded to avoid static electricity, which can damage electronic components.
Planning Your Repair Process
Before starting repairs, troubleshoot your controller to identify specific issues. This step is essential to avoid wasting time on unnecessary fixes. Think of it as a detective game where you gather clues before solving the case!
Step-by-Step Guide – How to Connect Retro Game Controllers
Now that you’re prepared, let’s dive into how to connect retro game controllers and troubleshoot any issues.
Initial Diagnostics
Start by testing your controller. Here’s how:
- Visual Inspection: Look for any visible damage like frayed wires or broken buttons.
- Button Test: Press each button to see if they stick or respond slowly.
- Connection Check: Plug the controller into the console and check if it works.
If your controller doesn’t respond, don’t panic. This is where your repair skills will come into play.
Detailed Connection Process
Connecting your retro game controller involves a few simple steps:
- Plugging It In: Insert the controller into the appropriate port on your console. Make sure it fits snugly.
- Testing Input: Power on the console and try using the controller. Navigate the menu to see if it works.
- Troubleshooting: If it doesn’t work, check the connections and ensure the controller is compatible with your console.
Sometimes, you may encounter issues like an unresponsive controller. If that happens, recheck the connection or try it on a different console if possible.
Integration with Modern Systems
Want to connect that classic Super Nintendo controller to your new gaming setup? You can! There are adapters available that allow you to use retro controllers on modern systems. Here’s how it works:
- Get an Adapter: Purchase a compatible adapter for your controller-type.
- Connect the Controller: Plug your controller into the adapter.
- Plug the Adapter into Your System: Then, connect the adapter to your modern console or PC.
This process allows you to enjoy classic games with your favorite controllers without needing the original console.

Troubleshooting and Advanced Repairs
Sometimes, even after connecting everything, problems may arise. Here’s how to troubleshoot and fix common controller issues.
Addressing Common Connection and Repair Issues
If you face problems like unresponsive buttons or connectivity errors, follow these steps:
- Check the Connection: Make sure the controller is plugged in correctly.
- Inspect Wires: Look for any breaks or frayed wires.
- Clean the Buttons: Use isopropyl alcohol and a cotton swab to clean around sticky buttons.
If a button is stuck, it might need more attention. Clean the button thoroughly and check if it needs replacement.
Controller-Specific Repair Insights
Now let’s focus on some specific controllers:
How to Repair Sega Genesis Controllers
- Open the Controller: Use a screwdriver to remove the screws.
- Inspect the Circuit Board: Look for any broken connections or corrosion.
- Replace Parts: If you find damaged components, replace them with quality parts.
How to Fix a Super Nintendo Controller
- Remove the Shell: Carefully open the controller.
- Clean the Contacts: Use alcohol to clean the contact points.
- Reassemble and Test: Put the controller back together and test it on your console.
By following these steps, you can restore your classic controllers and keep the gaming spirit alive.

Expert Advice and Case Studies
Many gamers have successfully repaired their old controllers, and you can too! For instance, a gamer shared how they fixed their NES controller by replacing the worn-out buttons. They found the experience rewarding and saved money by not buying a new controller.
Another gamer fixed a Sega Genesis controller by soldering a new wire to the circuit board. They reported that it felt great to have the controller working again, especially when playing their favorite retro games.
These stories show that with a little patience and the right tools, you can tackle controller repairs confidently. For those interested in DIY repairs, consider checking out our DIY repair guide for retro consoles to learn more techniques.
By exploring these techniques, you’ll not only fix your controllers but also become part of the vibrant retro gaming community. Embrace the challenge and enjoy the nostalgia that comes with restoring your classic gaming gear!
FAQs
Q: I sometimes face intermittent connection issues with my retro game controllers—what troubleshooting steps can I take to ensure a stable, responsive connection when using them on modern systems?
A: To troubleshoot intermittent connection issues with retro game controllers on modern systems, ensure that connectors on both the controller and console are clean and free from corrosion, using isopropyl alcohol if necessary. Additionally, check for any loose connections, ensure the controller is fully charged or has fresh batteries, and avoid using third-party adaptors that may cause compatibility issues.
Q: My Super Nintendo and Sega Genesis controllers occasionally have unresponsive or stuck buttons. What hands-on repair tips or DIY fixes should I consider before seeking professional help?
A: For unresponsive or stuck buttons on your Super Nintendo and Sega Genesis controllers, start by cleaning the buttons and contacts with a cotton swab dipped in isopropyl alcohol to remove dirt and grime. If that doesn’t resolve the issue, disassemble the controller to inspect and replace any worn-out rubber contacts or membranes, ensuring all components are properly seated and free of dust.
Q: I’m trying to refurbish one of my classic controllers but want to avoid damaging it further. What best practices and essential tools can guide me through safely disassembling and reassembling these retro devices?
A: To safely disassemble and reassemble classic controllers, use a precision screwdriver set to avoid stripping screws, and organize parts for easy reassembly. Utilize anti-static wrist straps to prevent electrostatic discharge damage, and take photos during disassembly to reference during reassembly. Always work in a well-lit area and handle components carefully to avoid further damage.